How do I send a secure email from the web portal?
The Secure Exchanges online portal allows you to send a secure message without using your email application (Outlook, Gmail, etc.). Here's how.
1. Log in to the online portal
Log in to your account, then click on Send a secure email.

Once logged in, you will see the following interface:
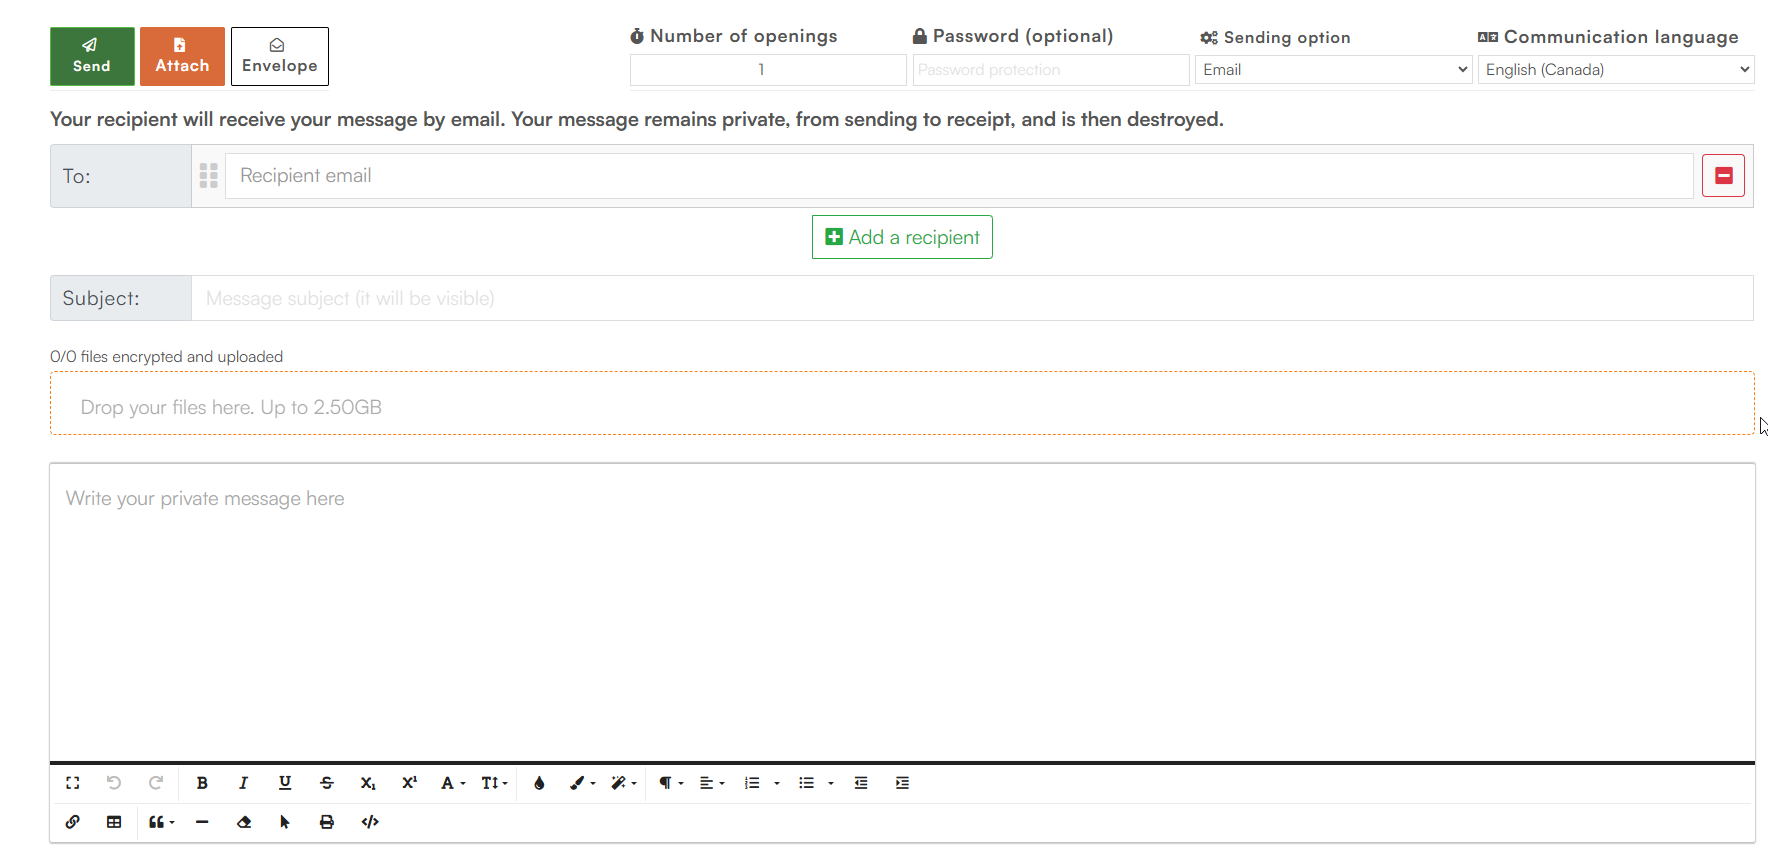
Description of the interface buttons and options
1 — Send *Main button to transmit the secure message when:
- The recipients have been added;
- The message has been written;
- The attachments are ready (if applicable).
2 — Attach *Allows you to add files to your message.
- You can click on Attach;
- or drag and drop your files into the "Drop your files here" area.
3 — Envelope *Generates a secure envelope that you can send to your recipient so they can send you documents or information in a protected manner.
- See the full procedure for sending an envelope: How to send a secure envelope from the online portal?
4 — Number of openings *Determines how many times your recipient can open your secure message.
- By default: 1 opening, you can increase this number.
5 — Password (optional) *Adds extra protection to your message.
- You must then transmit this password to the recipient by a separate means (e.g. telephone).
6 — Sending option *Selects the transmission method:
- Email *Your recipient will receive your message by email.
- SMS *Your recipient will receive your message by text message.
- Email + code by SMS *Your recipient will receive your message by email and a random code by text message to access the message.
- SMS + code by email *Your recipient will receive your message by text message and a random code by email to access the message.
7 — Communication language *Defines the language used in the interface that your recipient will see.
- French ;
- or English
8 — Add a recipient *Adds one or more recipients to your message.
- Each recipient can be positioned in a specific order. *The area to the left of the "Recipient Email" field allows you to move recipients to define a specific sending order (especially useful for signatures).
9 — Delete a recipient *Deletes a recipient
- The red "-" button removes a recipient from the list.
10 — Subject area *Allows you to enter the subject of the message.
- (Visible to the recipient)
11 — Message composition area
- Main section for writing the content of the secure email.

Related Articles
How do I send a secure envelope from the web portal?
The secure envelope allows you to receive information or documents in a protected manner, without your recipient needing a Secure Exchanges account. Here's how to generate an envelope from the online portal. 1. Log in to the Secure Exchanges online ...What management options are available in my account?
The Secure Exchanges online portal allows you to manage several aspects of your account, including your user profile, security settings, and usage preferences. Here is a clear and structured overview of all the options accessible from your user area. ...How can I view my submission history in the portal?
The Secure Exchanges online portal logs allow you to view all activity related to your messages: sending, opening, downloading, signing, IP addresses, and more. You can also delete a message before it expires and export your logs for your archives or ...How do I configure automatic detection of sensitive terms?
Secure Exchanges' sensitive text manager automatically identifies sensitive information in email content before it's sent. By defining a custom dictionary of sensitive words or phrases (in plain text or using regular expression patterns), you're ...How do I find and download my invoices?
You can view and download your invoices by logging into your account on the Secure Exchanges online portal . 1. Go to the Bills section Log in to your account on our online portal. ? If you don't know how to log in, follow this procedure: How to log ...