How do I send a secure envelope from the web portal?
The secure envelope allows you to receive information or documents in a protected manner, without your recipient needing a Secure Exchanges account.
Here's how to generate an envelope from the online portal.
1. Log in to the Secure Exchanges online portal and click on "Send a secure message"

2. Access the envelope creation tool
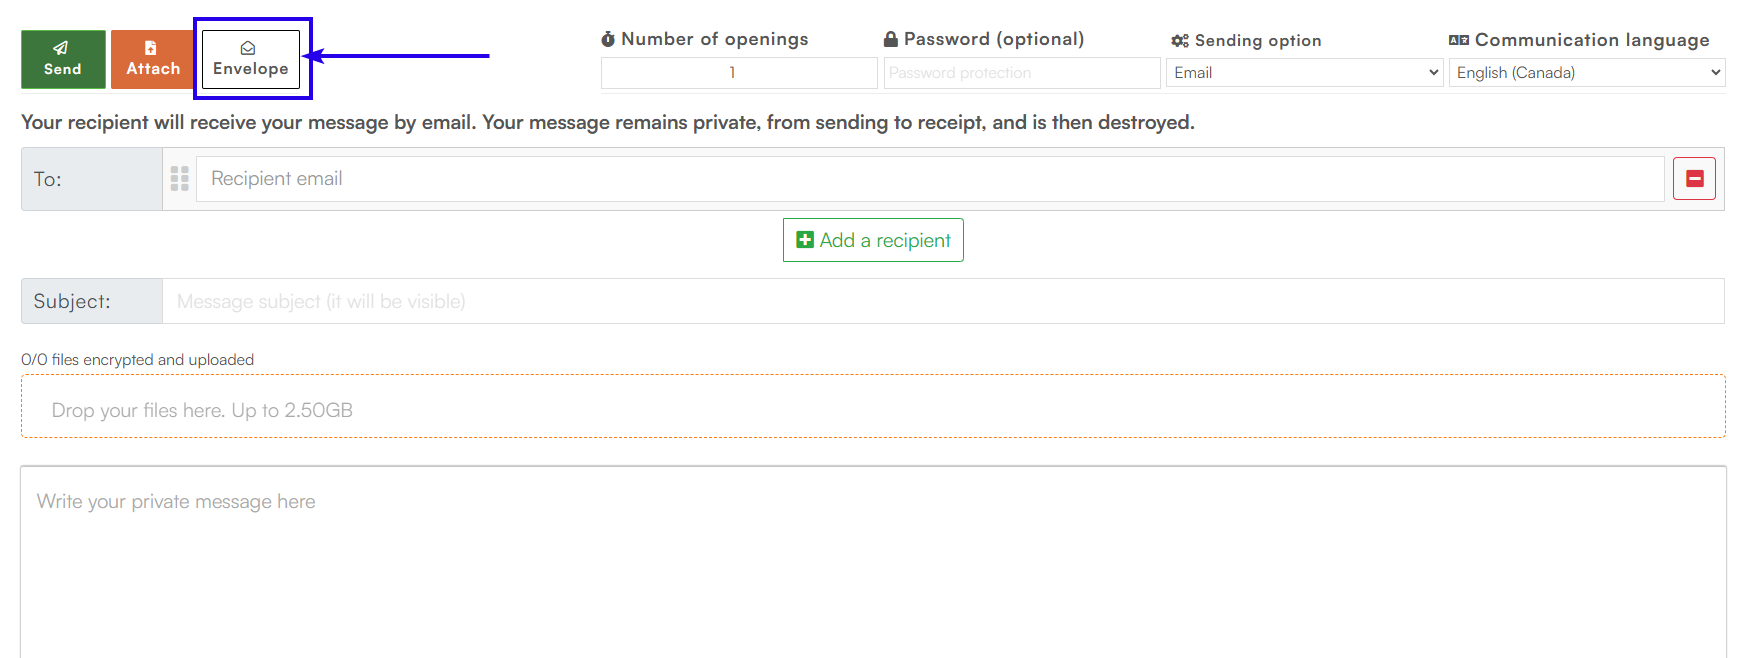
In the online portal, click on the " Envelope" button. A configuration window will appear.
3. Configure your envelope
In this window, you can define the following parameters:
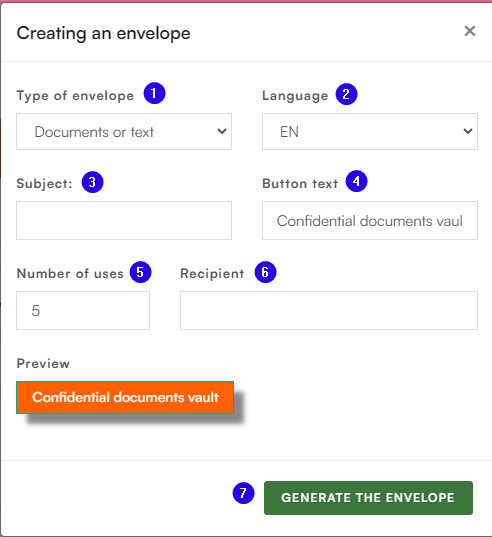
1 — Envelope Type *Documents / text or Credit Card
2 — Envelope language *determines the language used in the recipient's interface.
3 — Subject of the envelope *the subject of the envelope.
4 — Button text *You can customize the text of the action button (e.g., Upload your documents, Send the requested files, etc.).
5 — Number of uses *limits the number of times the envelope can be used (useful option for one-off mailings).
6 — Recipient *email address to which you are sending the envelope.
4. Generate the envelope
Once all fields are configured, click " Generate envelope" .
Two links will then appear:
- Envelope button URL link
- The envelope button

You can use either one, depending on your preference. Here's an image to show you the difference between the envelope button's URL link and the envelope button itself.

4. Insert the envelope into your email
- Click on one of the two links to copy it.
- Close the options window.
- Paste the link into the body of your email or your messaging system (Outlook, Gmail, TEAM, or other).
- Send your message or email
Your recipient will receive an email containing a link to the secure envelope. They will then be able to send you their documents or information in a completely secure manner.

You will receive the information he has deposited in the email inbox associated with your Secure Exchanges license.
Related Articles
How do I send a secure email from the web portal?
The Secure Exchanges online portal allows you to send a secure message without using your email application (Outlook, Gmail, etc.). Here's how. 1. Log in to the online portal Log in to your account, then click on Send a secure email. Once logged in, ...How can I secure replies and responses to my sent messages?
The Protected Returns feature allows you to automatically secure anything your customers return to you from a Secure Exchanges shipment. It applies to: signed documents; files placed in an envelope; any content that your customer sends back to you ...How can I view my submission history in the portal?
The Secure Exchanges online portal logs allow you to view all activity related to your messages: sending, opening, downloading, signing, IP addresses, and more. You can also delete a message before it expires and export your logs for your archives or ...How do I find and download my invoices?
You can view and download your invoices by logging into your account on the Secure Exchanges online portal . 1. Go to the Bills section Log in to your account on our online portal. ? If you don't know how to log in, follow this procedure: How to log ...What management options are available in my account?
The Secure Exchanges online portal allows you to manage several aspects of your account, including your user profile, security settings, and usage preferences. Here is a clear and structured overview of all the options accessible from your user area. ...