What management options are available in my account?
The Secure Exchanges online portal allows you to manage several aspects of your account, including your user profile, security settings, and usage preferences. Here is a clear and structured overview of all the options accessible from your user area.
1. Details about your licence

- Package: indicates the type of licence associated with your email.
- SESAR module: indicates whether you have the SESAR module and if it is active.
- Monthly usage: indicates your message consumption for the month.
- Expiration date: displays the exact date and time your licence expires, that is, the automatic renewal date.
Note: Even though sending is technically unlimited, a preventative limit against abuse may apply.
2. Details about your identity, contact and authentication

- First name: field to edit your first name.
- Last name: field to edit your name.
- Email: email address to which your licence is assigned.
- Mobile number: number used for security (SMS, 2FA authentication, protected returns).
3. Contact and authentication
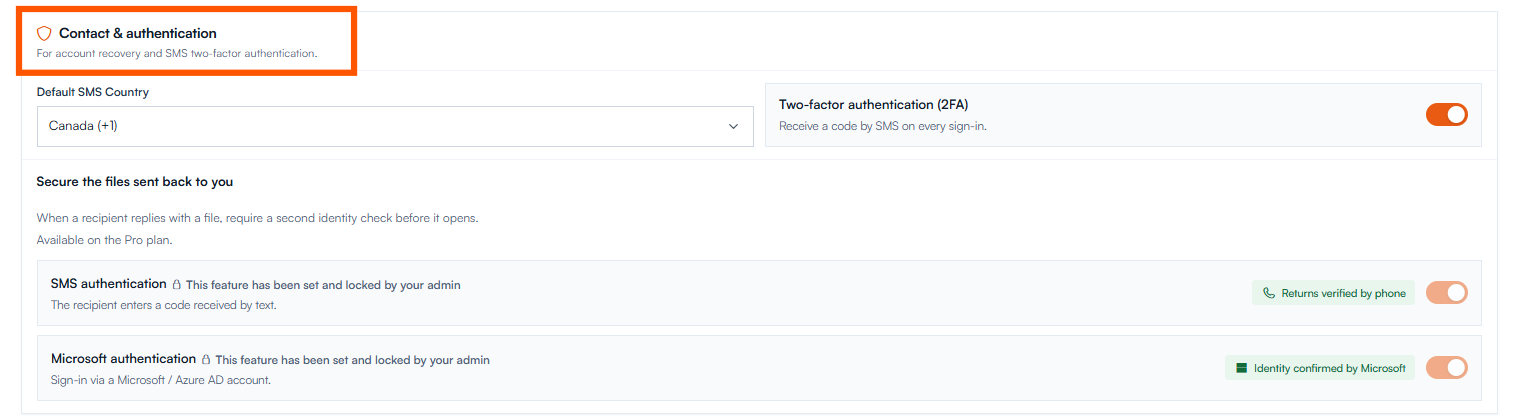
- Default SMS country: international prefix used by default when you protect an email with an SMS code.
- Enable 2FA authentication: enables two-factor authentication for logging into the online portal.
- Secure the files sent back to you: options available depending on your plan. These options are only available with Pro licences.
- SMS: the recipient must enter a code sent by SMS to reply to you.
- Microsoft: protection based on Microsoft identification.
4. Regional preferences
- Time zone: determines your local time for logs, signatures and timestamps.
- Date format culture: allows you to adapt the display of dates according to your region (for example, Canadian French).
5. Integrations and APIs
Email connector: sends an activation link for Outlook or Gmail.
6. Saving settings
The "SAVE" button allows you to save all changes made to your account.
7. Quick actions area (at the top of the page)
Send a secure message: direct access to the interface for sending a secure message, file or envelope.
8. Navigation tabs
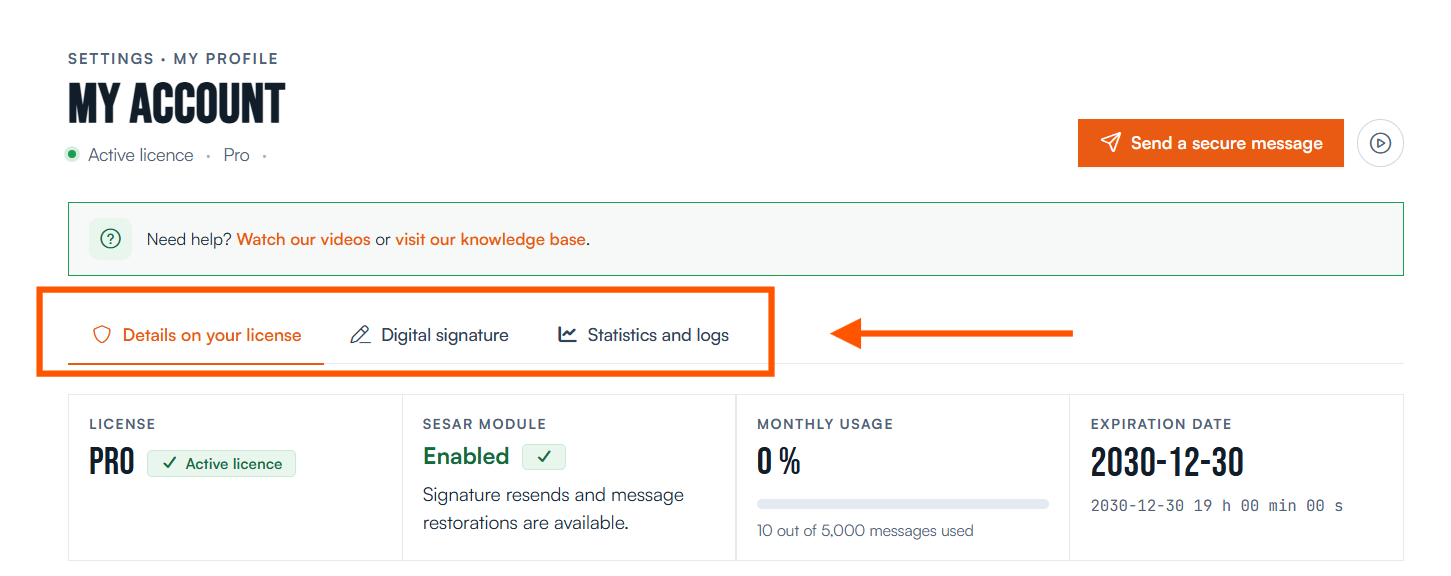
These three tabs provide access to the main categories of settings and information for your account.
- Details on your licence: default tab. Displays all information related to your licence, your profile, your security settings and your preferences.
- Digital signature: allows you to define your signature marks when signing documents. Available only with Pro licences.
- Statistics and logs: provides access to your sending history and related activities.
To learn how to access the portal, see Log in to the Secure Exchanges online portal.
Need help?
Our team is available to assist you. Write to us at support@secure-exchanges.com