How do I get a document signed using Secure Exchanges on Gmail?
Secure Exchanges integrates directly into your Gmail interface so you can send a document for signature in a few clicks, without leaving your inbox. This article describes the complete procedure, from attaching the document to be signed through to sending the signature request. Use it whenever you need to collect one or more signatures on a document you send by email.
Prerequisites
Before you begin, the Secure Exchanges extension must be installed in your browser and your licence must be activated. If this is not done yet, follow the procedure described in How do I install and activate Secure Exchanges on Gmail?.
Step 1: Attach the document
Compose a new email in Gmail and insert the PDF files to be signed using the "Attach files" button (the Gmail paperclip), as you normally would.
Step 2: Turn on the signature request
Once the file is attached, click the "Get a signature" button that appears below the attachment.
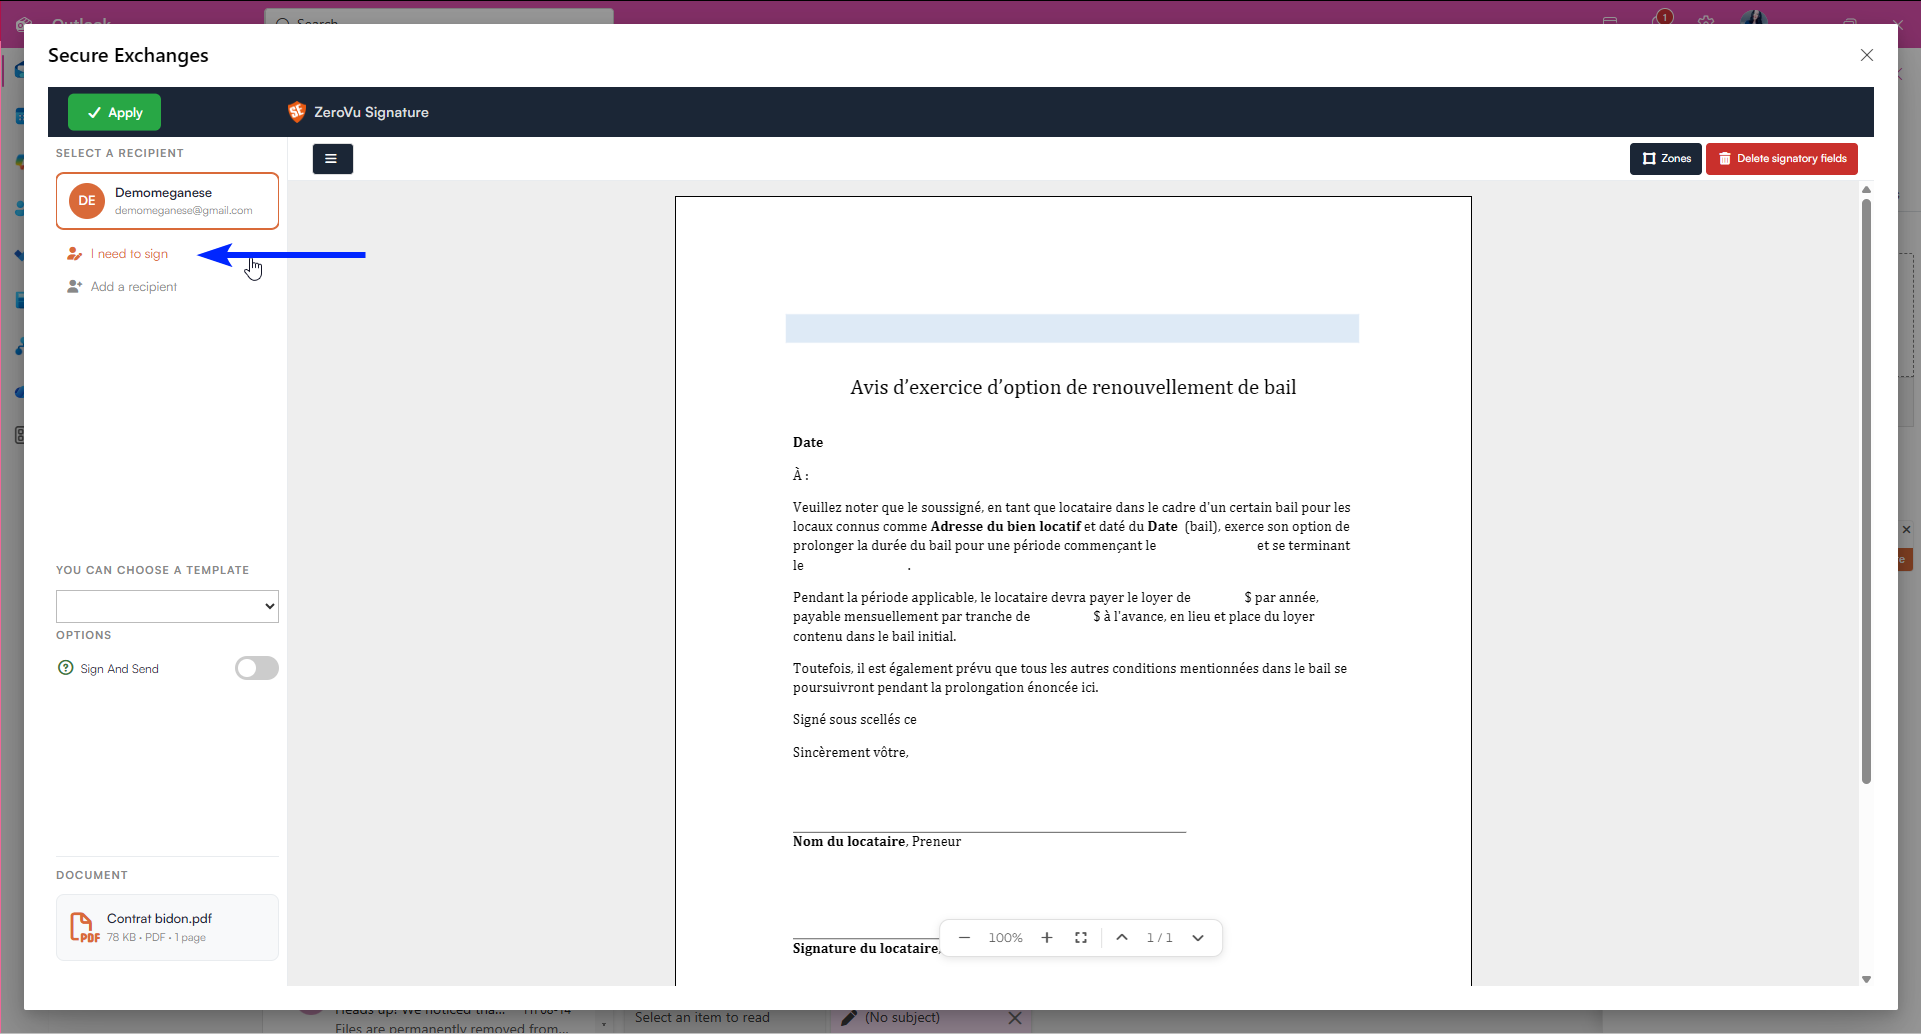
Step 3: Place the signature areas in the document
This is where you define precisely who must do what, and where in the document.
If the document already contains PDF fields
Some PDF documents already contain embedded fields (text areas, checkboxes, signature fields, etc.). If so, Secure Exchanges detects them automatically and offers you a choice of how to handle them:
- Include all detected fields: all existing areas are imported as they are.
- Select the fields you want: you choose which ones to keep among the detected fields.
- Decline detection: the existing fields are ignored and you draw everything manually.
Placing an area manually
Before drawing each area, make sure you have selected the right signer.
- In the left-hand column, click the signer for whom you want to place an area. Their name must be active, outlined in orange.
- In the document, draw a rectangle where that signer must act.
- Choose the field type in the menu that appears.
Repeat these three steps for each area to be placed, changing signer in the list whenever necessary.
Available field types
- Signature: signature area
- Initials: area for initials
- Text box: single line text field
- Text area: multi line text field
- Date picker: date selected from a calendar
- Date of signature: signature date
- Number: numeric field
- Checkbox: checkbox
- Radio button: single choice among several options
- Drop-down list: selection among predefined options
- Option list: multiple selections
About the "Sign and send" option
This option lets you sign a document yourself and automatically send the final signed copy to one or more recipients. After placing the signature areas, you sign directly in the interface. Once the signature is complete, the final document is generated and sent to the selected recipients.
Example: you sign a certificate or a contract that requires only your signature, you sign at the same time as you define your areas, and the final signed version is automatically sent to your client, supplier or partner.
Correcting an area assigned to the wrong signer
An area may end up assigned to the wrong signer, in particular after an automatic field import, or if you forgot to change the active signer before drawing an area. To correct this:
- In the left-hand column, select the correct signer, the one the area should belong to.
- Click the "Zones" button at the top right of the screen.
- Select the area or areas to reassign.
The selected areas are automatically assigned to the active signer.
Step 4: Apply and send
Once all the areas are defined and correctly assigned to each signer:
- Click "Apply", in the top left corner of the screen.
- Check or adjust the sending settings if necessary.
- Click "Send with Secure Exchanges".
The chain signature process starts. The first signer receives the document by email, signs it, and the document is automatically forwarded to the next one until all the signatures have been collected. Recipients in copy receive the final copy once the process is complete.
Troubleshooting
- The Secure Exchanges options do not appear in your Gmail compose window: check that the extension is installed in your browser and that your licence is activated, by following How do I install and activate Secure Exchanges on Gmail?.
- The extension is installed but Secure Exchanges stays inactive: check in the extension settings that it has not been temporarily disabled, as explained in What are the Secure Exchanges configuration settings on Gmail?.
Need help?
Our team is available to assist you. Write to us at support@secure-exchanges.com
Related Articles
- How to send attachments without Secure Exchanges using Gmail?
- Can I add a new signer to a document without leaving the signature area settings interface in Gmail?
- What are the Secure Exchanges configuration settings on Gmail?
- How to send a secure email on Gmail using Secure Exchanges?
- How do I disable Secure Exchanges on Gmail?