How do I manage the order of signatories or remove a signatory?
This feature allows you to change the order in which your signatories receive a document to sign, as well as to cancel the signature of one or more signatories during the process, without having to restart the entire transaction.
Prerequisites
To use this feature, you must have:
- a Pro licence
- a SESAR licence
Step 1: Access the signatory order management
- Log in to the Secure Exchanges online portal.
- Go to the Signature Tracking section.
- Select the relevant signature transaction from the list.
- Click on the Manage order option.
The Order of Signatories window opens and displays the list of all signatories to the transaction, in their current signing order.
Step 2: Change the order of signatories
To reorganize the order in which your signatories receive the document:
- Use the drag handle, the icon to the left of the name, to drag a signer up or down.
- The number to the left of each signatory indicates their position in the sequence: 1 for the first to sign, 2 for the second, and so on.
- Click Save to apply the changes.
Step 3: Cancel a signatory's signature
- In the list of signatories, locate the person whose signature you wish to cancel.
- Click the Cancel button, the red prohibition icon to the right of their email address.
- The cancelled signer will appear crossed out in the list, with a Restore option in case you change your mind.
- A configuration section appears allowing you to define how the cancelled signer's fields will appear in the final document.
Cancellation style for signatures and initials
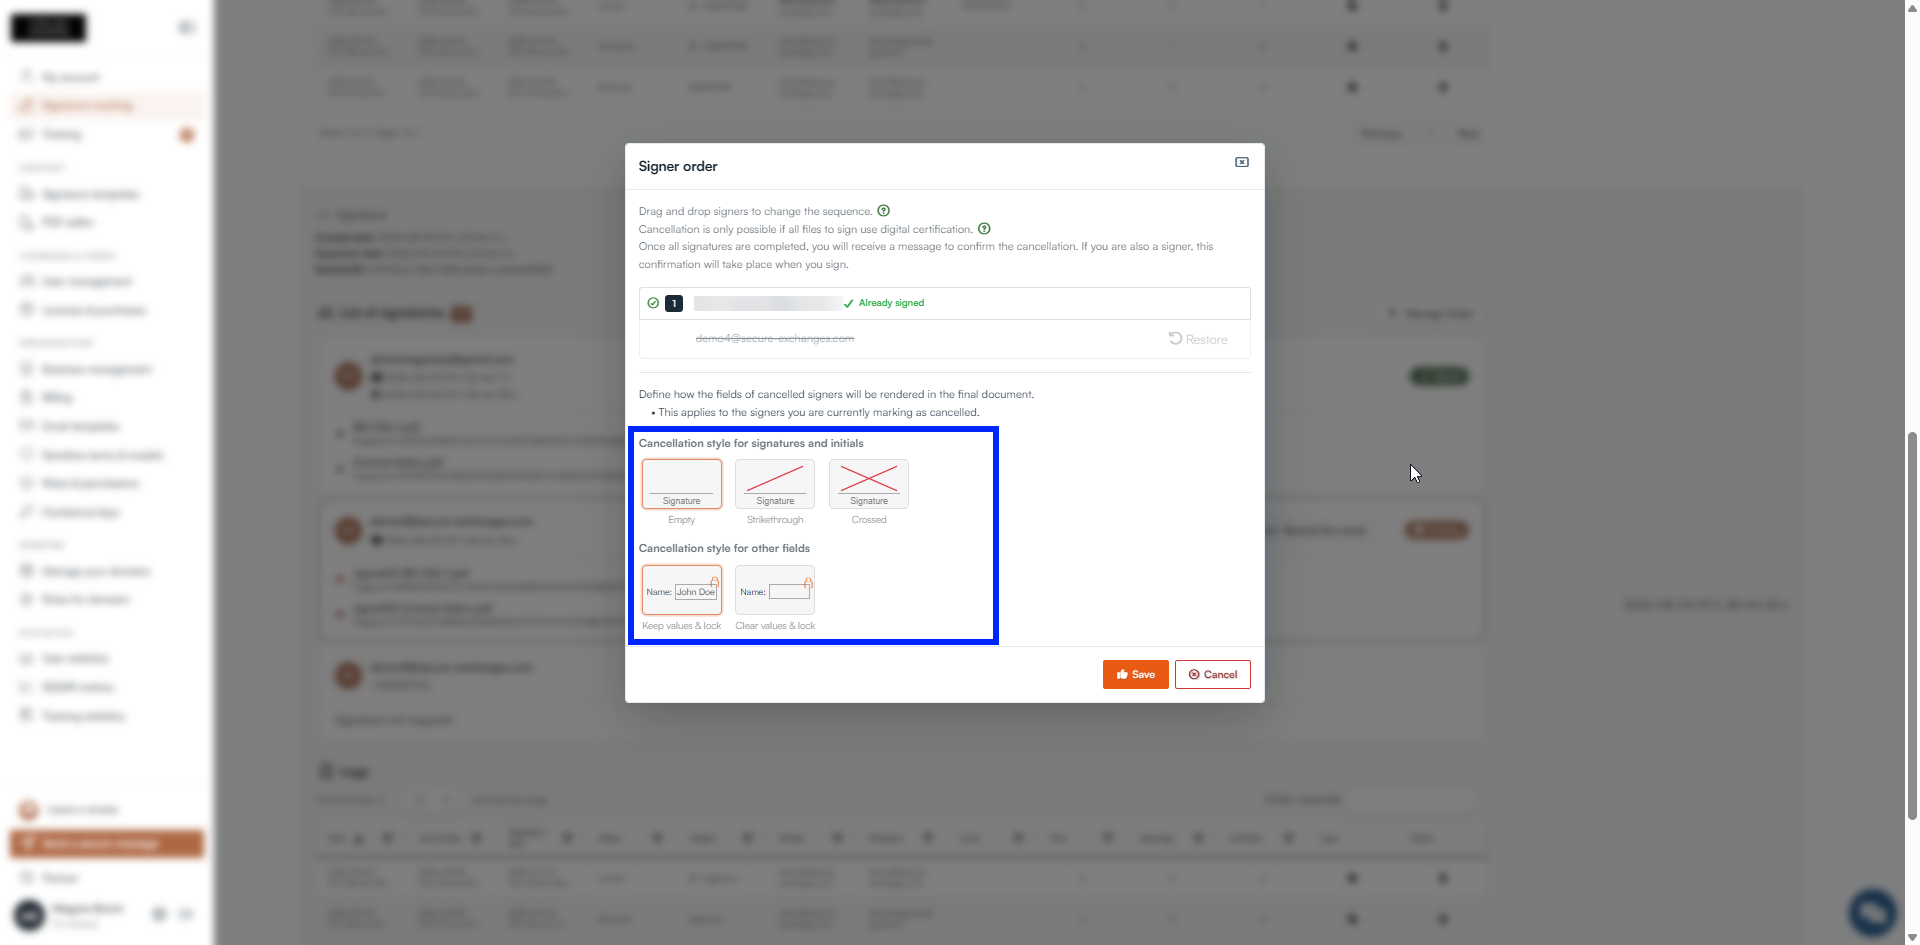
These options determine the visual appearance of the signature and initials boxes of the cancelled signer.
- Completed: the box is highlighted by a grey border with no internal mark. Use it for a discreet cancellation, when you simply want to indicate that a signature is no longer required.
- Rod: a diagonal red line crosses the signature box. Use it to clearly indicate the cancellation while keeping the document legible and professional.
- Cross: a large red cross is placed on the box. Use it for a very visible cancellation, when it is essential that anyone viewing the document immediately understands that this signature has been cancelled.
Cancellation style for other fields
These options determine what happens to the other fields (text, dates, checkboxes) that had been assigned to the cancelled signer.
- Keep the values and lock:: the information already entered is retained as is in the document. Use it when the information entered remains relevant.
- Empty and lock: the fields are emptied and locked, preventing any further modification. Use it when you want to guarantee the integrity of the document.
Step 4: Confirm and finalize the cancellation
- Click Save to confirm your configuration.
- A confirmation message appears at the bottom of the screen: "Confirm cancellations and the new order?"
- Click YES to permanently apply the cancellation and the new order of signatories, or NO to return to the previous screen and make changes.
Once the confirmation has been completed, the signing process continues with the remaining signatories, in the new order defined.
Need help?
Our team is available to assist you. Write to us at support@secure-exchanges.com